13.4 Explanation of Files
This section details what files are located in the associated directories and what they do.
Each of these exists at the root directory of the directory.
13.4.1 _site.yml
The _site.yml file controls how the entire website will be built.
This includes defining the title displayed on the navigation panel, the items across the top of the navigation panel and any of the hyperlinks.
The file takes the form of a YAML document.
Each sub-section is identified with two spaces, and the hierarchy determines how to website is built and how items appear on the navigation bar.
The current _site.yml file is shown below.
name: "Wake Forest University"
output_dir: "docs"
navbar:
  title: "Wake Forest University Institutional Research"
  right:
    - text: "home"
      href: index.html
    - text: "contact us"
      href: https://ir.wfu.edu/contact/
    - text: "dashboards"
      href: dash.html
    - text: "studies"
      href: studies.html
    - text: "survey results"
      href: survey.html
    - text: "internal tools"
      menu:
      - text: "irverse"
        href: tools/irverse/index.html
      - text: "irtools"
        href: tools/irtools/index.html
      - text: "wfudata"
        href: tools/wfudata/index.html
      - text: "usual suspects template"
        href: tools/usualsuspects/index.html
      - text: "Data Scientist's Handbook"
        href: tools/data-scientist-handbook/index.html
    - text: "Power BI"
      menu:
      - text: "Your First Time"
        href: powerbi/power_bi.html
      - text: "Sharing Apps"
        href: powerbi_app_sharing.html
      - text: "Accessing Apps"
        href: powerbi_accessing_apps.html


output:
  html_document:
    theme: journal
    highlight: textmate
    include:
      after_body: footer.html
    css: css/style.css
The file above provides the following instructions:
- name - indicates the name of the website.
- output_dir - indicates the directory where the built website will be placed. In the above example, the built website will be put in the “docs” directory.
- navbar - this section dictates the structure of the navigation bar.
- title - represents the title of the website which will be displayed on the website.
- right - indicates that the navigation options should be right justified
- - text, href - specify the link name of location for the different buttons on the navigation bar
- menu - indicates that a drop down menu is desired. Each menu drop down needs associated text and href links (be sure to indent two spaces)
- output - indicates some additional information about the output file, that the default style will use the
journalformat, with additional information thestyle.cssdocument. Additionally, thefooter.htmlwill be tacked onto the bottom of each webpage generated.
The above code will render the navigation bar as shown in Figure 13.2
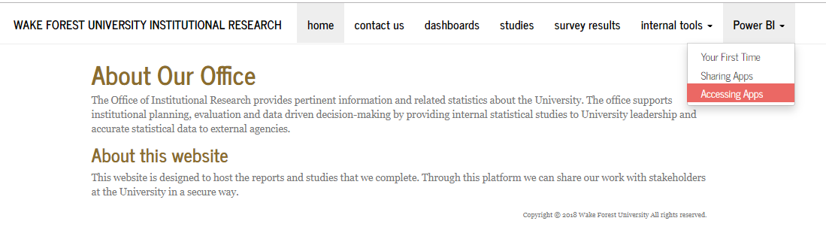
Figure 13.2: Rendered Navigation Bar
Any time that you update the _site.yml you will need to rebuild the entire website for these new changes to take place.
This can be done by navigating to the “Build” section in R Studio and pressing the “Build Website” button (See Figure ??).
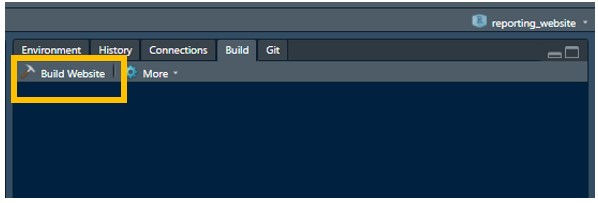
Figure 13.3: Build Website
The command line option is to type rmarkdown::render_site() into the R console.
Either of these commands will rebuild each Rmd into its associated html file using the instructions specified in the _site.yml file.
This can be a time consuming process, so it is best to think through your website before you make changes to the site structure.
Any time you modify the _site.yml file you will need to rebuild the entire website by pressing the “Build Website” button in the “Build” pane or typing rmarkdown::render_site() into the console.
13.4.2 robots.txt
The robots.txt file is a simple text file that indicates to search companies what content can be indexed. As these websites are internal and behind a firewall, this is generally not an issue. However, in order to be safe, it is a good practice to include a robots.txt in every directory. The robots.txt as written currently indicate that the page content should not be scraped nor should the page be indexed.
    User-agent: *
    Disallow: /
13.4.4 .htaccess
The .htaccess file indicates who can view each page.
This file instructs the firewall who can see and access the different pages.
When attempting to access the site, users will be prompted to enter their Wake Forest Credentials.
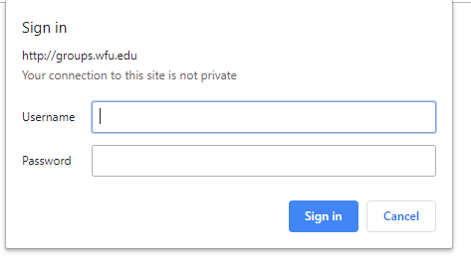
Figure 13.4: Internal Website Authorization Prompt
After the user enters their credentials, they will be allowed access to the site.
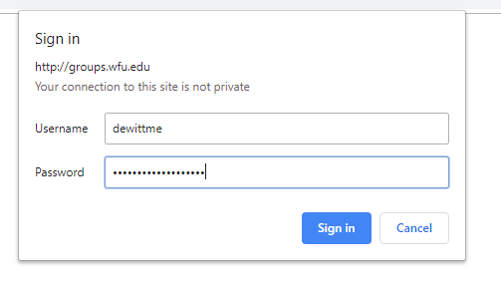
Figure 13.5: Internal Website Authorization Completed
The base format for the file and that which is used as a default allows only faculty and staff with valid Wake Forest credentials to view content on the site.
This file structure is seen below.
Note that it has the Require field that indicates Staff and Faculty can view the document.
If you wanted all Wake Forest faculty, staff and students to have access to the file, you could remove the Require ldap-attribute line.
AuthType Basic
AuthName "WFU Academic Computing"
AuthBasicProvider ldap
#AuthzLDAPAuthoritative off
AuthLDAPURL 'ldaps://ldap.wfu.edu:636/ou=Users,dc=wfu,dc=edu?uid'
Require valid-user
Require ldap-attribute description="Staff" description="Faculty"
IF you want to specify specific users to view the webpage you can do so by adding a Require user line to the .htaccess file.
For example in the below .htaccess file only the three users specified can access the webpage (dewittme, shickaw, handwepg).
AuthType Basic
AuthName "WFU Academic Computing"
AuthBasicProvider ldap
#AuthzLDAPAuthoritative off
AuthLDAPURL 'ldaps://ldap.wfu.edu:636/ou=Users,dc=wfu,dc=edu?uid'
Require user dewittme shickaw handwepg
Further restrictions could be made which include limiting users to being on the on-campus network, to creating unique logins and associated passwords for others. The details and some examples are located here on the Wake Forest IS personal page website.
It is important to also remember that these access files work like an onion.
If a .htaccess file is located in a directory, that directory and all other directories within said directory inherit those permissions.
If you want to further restrict access within a sub-directory, it is possible, but access can’t be expanded within a sub-directory.
It is also a good security practice to put an .htaccess file in each directory and sub-directory, even if they are identical in the case that one becomes corrupted and cannot instruct the firewall to block users.
13.4.5 .gitignore
The .gitignore files tell which files not to load into the git repository.
Currently, this file will ignore any data (as you do not necessarily want to have version control on your data) for example xls, xlsx, txt, csv and sas7bdat files.
This also ensures that no data are pushed to the cloud hosted repositories.
IF there is a file or something sensitive that you do not want to be stored in the private repository, add it to this file.
13.4.6 .Rmd files
The .Rmd files are the Rmd files that generate the associated webpages.
These are what you will be modifying most of the time.
As these are R Markdown documents, you can include code, text, graphics, links, and the full range of the R Markdown functionality.
As a reminder, whatever you name the R Markdown file will be reflected in the rendered html file.
For example if you name a file My-Stuff.Rmd then the associated html file will be names My-Stuff.html.
This is important when trying to link documents together within the website.
For example if you create a new page (via creating a new R Markdown Document) and want to add it to the navigation bar (See Section ??), you can use the My-Stuff.html as the location of the file.
Notice that each R Markdown starts with a simplified YAML header in the form of:
Then note that this will be rendered as follows:

Figure 13.6: Rendering of YAML Header for Internal Website
In each of these R Markdown Documents you can use all of the tools available in the R Markdown Language. Again, see Rmarkdown website for some examples.
13.4.7 sub-folders
Sub-folders are used to manage specific projects and dashboards where viewing might need to be restricted to different parties. Using sub-folders also helps ensure that the root directory is not cluttered with additional files. For example in Figure ?? you can see how the current directory is organized with:
- dashboards
- figs
- national_clearing_house
- power_bi
- site_libs
- tools
Each sub-folder has a specific topic that it covers.
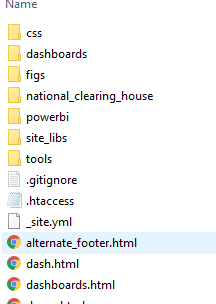
Figure 13.7: Existing Subfolder Structure
If we were to look at the “dashboards” directory in details as in Figure 13.8 we can see that each individual dashboard exists in its own sub-folder. This allows us to set individual viewing permissions for each dashboard. Each directory has its own .htaccess file as well as the associated html dashboard.
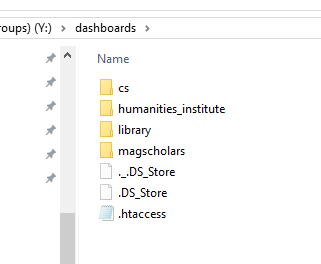
Figure 13.8: Details of Dashboards Directory
These links can then be reflected in the “dashboards” landing page on the internal website. The code that creates the hyperlinks and the associated output is shown in Figure 13.9.
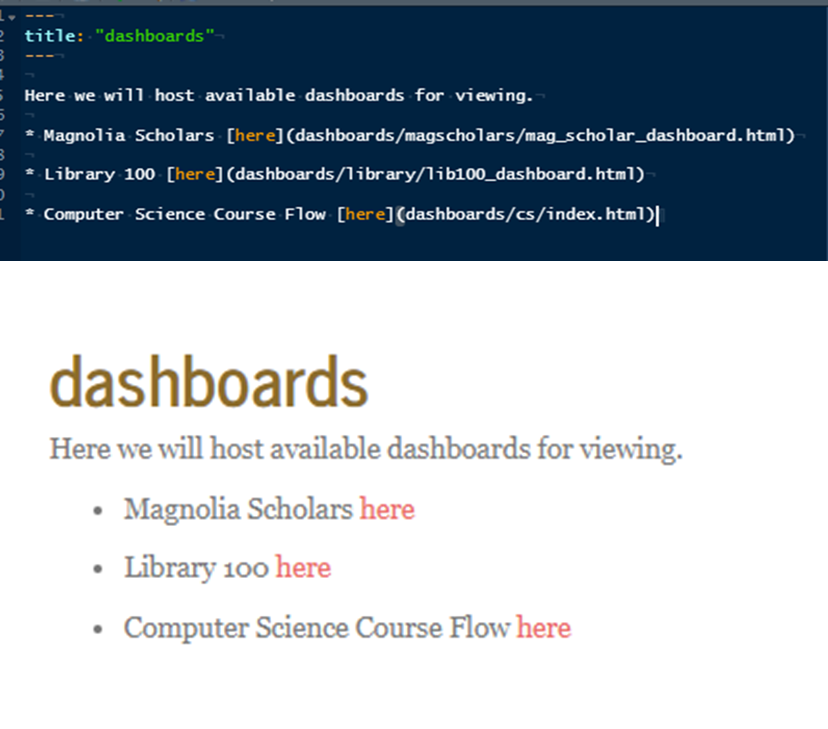
Figure 13.9: R MArkdown Code and Output Webpage
13.4.8 makefile
The makefile that is available in the root directory use GNU make to render only those pages that have changed.
GNU make examines the timestamps and compares the modification time for the source code (the Rmd file) and its associated output file (the html file).
If the Rmd is newer than the html file with the same name, then make will render only that associated R Markdown file.
If all of the html files are newer than their R MArkdown file, then nothing will be updated.
This is a nice feature because building the entire website can be very time consuming.
The code for the makefile with comments is shown below.
# Usually, only these lines need changing
RDIR= .
DOCS= ./docs

# List files for dependencies
DOCS_RFILES := $(wildcard $(DOCS)/*.html)

# Indicator files to show R file has run
DOCS_OUT_FILES:= $(DOCS_RFILES:.Rmd=.html)

# Run everything
all: $(DOCS_OUT_FILES) preview

# Compile Report
$(DOCS)/%.html: $(RDIR)/%.Rmd
    @echo compiling report
    -Rscript -e  'rmarkdown::render_site("$<")'

preview:
    open docs/index.html

# Once you are satisfied with the preview type "make update" in the terminal
update:
    Rscript -e "irtools::move_ir_group_site()"
In order to run the make file, go to the terminal in R Studio (note this not the R console, but the terminal). You will have access to the make tools as long as you have install R Tools and git for Windows (see Section 13.2). There type “make” as in Figure 13.10.
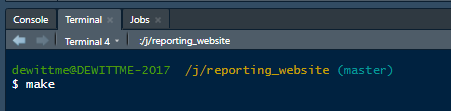
Figure 13.10: Make Example
This code will preview the newly make site in your browser.
At this time the code has not been pushed to the server.
To initiate this move type make update in the terminal and press enter.
This will use the functions in the irtools package to move the new files to the live server and display them for others.
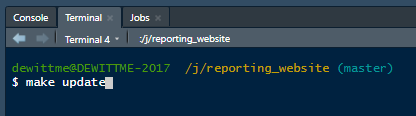
Figure 13.11: Make Update Example